11. Render
Rendering is the step where all the encoding and processing of the video is done, leaving you with your final output stitched video. If you didn’t render the video file, all you would have is a video that can only be played inside AutoPano Video Pro, not on any other platform, since right now all the data on the changes you have made to your footage have not been implemented.
All the synchronization, stitching and color blending are steps which have not yet been applied to your film. Rendering processes all of those changes, and then encodes the video in the format of your choice. In this case, we’re going to use H.264 as the format that works well on both desktop and mobile headsets.
When you have used Unity previously, you’ve been doing what’s known as real time rendering - where your VR app will render to the screen at run time. With a 360 video, we can render here, and play back a video on our device (in our case, a mobile phone) which requires very little processing power.
TIP: You can use the I and O keys to set the in and out position. This controls which part of the video will be rendered.
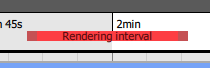
Use the I and O key to set the Rendering interval
Go ahead and click on the Render button to see your render options.

Click the Render button to see the render settings
After you click the Render button, you’ll be presented with a number of options in a pop-up dialog box.
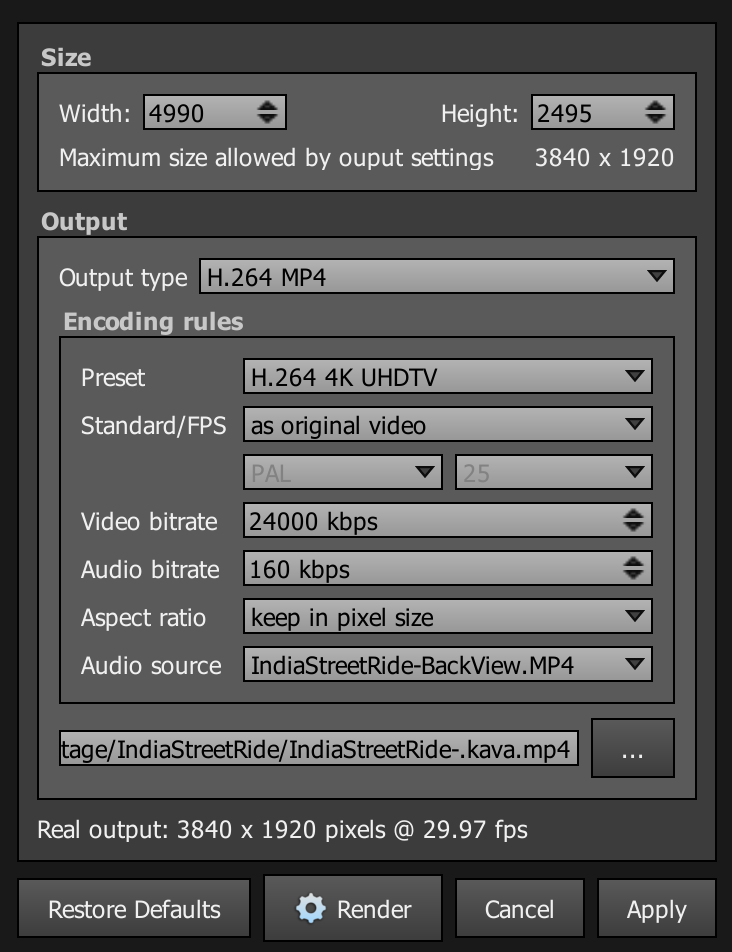
Autopano’s Render Settings dialog box
Use the following settings:
- Output type: H.264 MP4
- Preset: H.264 4K UHDTV
- Standard / FPS: as original video
- Audio Source: pick the video file that contains the best quality audio
Be sure to set the destination file location by clicking on the … button.
It’s very important that you set the frame rate to match the source. Frame rate is the number of individual pictures, or frames, that are displayed per second. Whenever we select “same as source” we are making sure that the video doesn’t play faster or slower than our original recording, which would introduce lots of problems for the end viewer.
When you’re happy with your settings, press the Render button to create a final MP4 file.
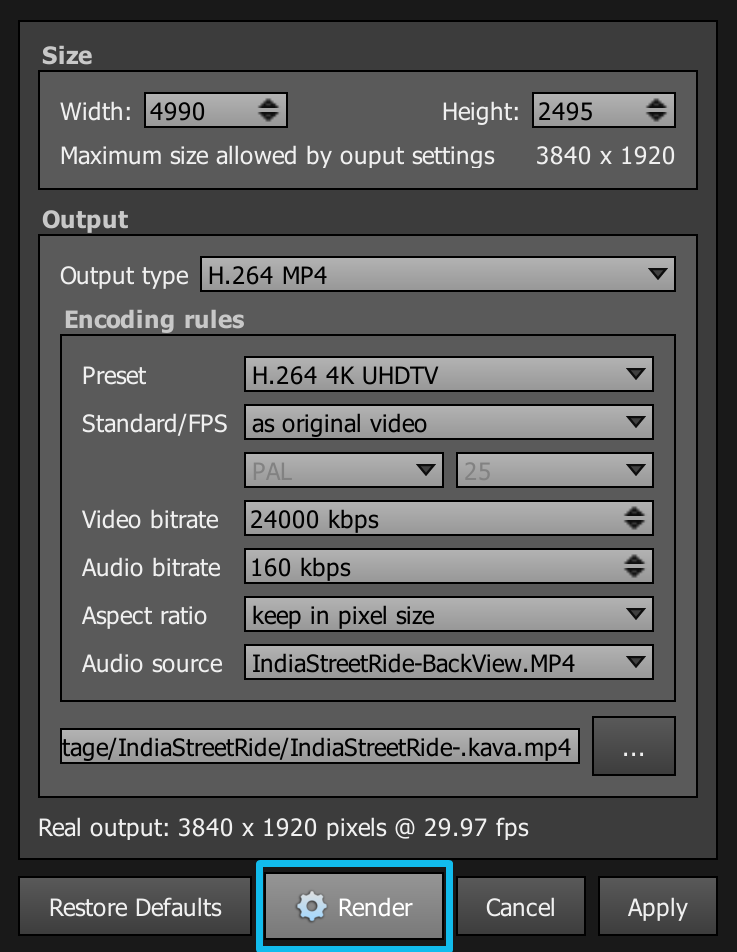
Press the Render button to output a final MP4 file